Subscribe to OW blog for an instantly better inbox
Oops! Something went wrong while submitting the form.

Articles and Podcasts on Customer Service, AI and Automation, Product, and more
.webp)
Great research has never been about speed alone. It’s about asking the right questions, understanding the context behind them, and uncovering insights that help teams make better decisions.
Optimal's AI Interviewer is designed to support that process. It’s designed to work alongside researchers and teams, so you can move faster without losing the depth and human nuance that makes research valuable.
Before building AI Interviewer, we spoke with and surveyed researchers, designers, and product teams to how they approach interviews today and where AI could genuinely help.
What we heard was consistent:
AI isn’t useful if it ignores how your team works. So instead of building a generic interviewer, we focused on building an AI Interviewer that fits into your current workflows and keeps researchers and teams in the driver's seat.
Here’s what we learned and how we brought it to life with Optimal’s AI Interviewer.
The best interviews start with a clear understanding of what you’re trying to uncover. With the AI Interviewer, you can add your research goals, audience details, company and product context, and additional context you want the AI to consider. This means the AI doesn’t just ask questions; it understands what you’re trying to learn and helps guide conversations in the right direction.
The same context also powers AI insights, helping ensure summaries, key themes, and citations are relevant, accurate, and aligned with what you're trying to learn.
One of the concerns with AI-led interviews is not having enough control. We’ve designed the AI Interviewer with this in mind.
For each question, you can choose how deeply you would like the AI Interviewer to probe and follow-up. You decide when deeper exploration is valuable, how the conversation flows, and the AI can then carry this out on your behalf.
AI Interviewer helps remove some of the barriers that make qualitative research difficult to scale. Use it to:
This isn’t about replacing researchers. It’s about removing operational work so you can focus on higher-value work, like synthesis, storytelling, and decision-making.
Every session comes with recordings, key summaries, and AI-generated insights with clear detailed evidence. Instead of reviewing hours of footage, you can quickly find what matters and confidently back it up. Review insights across your full study, or dive deeper into individual sessions and specific questions.
On the roadmap: Once your interviews are complete, you can use AI Chat to go further with your data and explore patterns across sessions, ask follow-up questions, and validate assumptions with real evidence.
Let’s address the elephant in the room. AI-led interviews aren’t something everyone is immediately comfortable with, and that’s fair. There are real limitations.
Some research scenarios require human sensitivity and judgment. Nuance, emotion, and edge cases still benefit from a human touch. Vulnerable populations and complex topics should always be handled with care. Optimal values a human-in-the-loop approach and know an AI Interviewer isn’t always suitable. With that in mind, we made sure that:
The AI Interviewer supports your work. It doesn’t replace your expertise.
AI Interviewer is now available in early access, and we’re continuing to learn from the teams using it. If you’re looking to scale your research without scaling your workload, run interviews across time zones, and spend less time on logistics and more time on insights, we’d love for you to try it.
👉 Book a demo to see how it fits into your workflow.
Already with Optimal? Register your interest for early access.
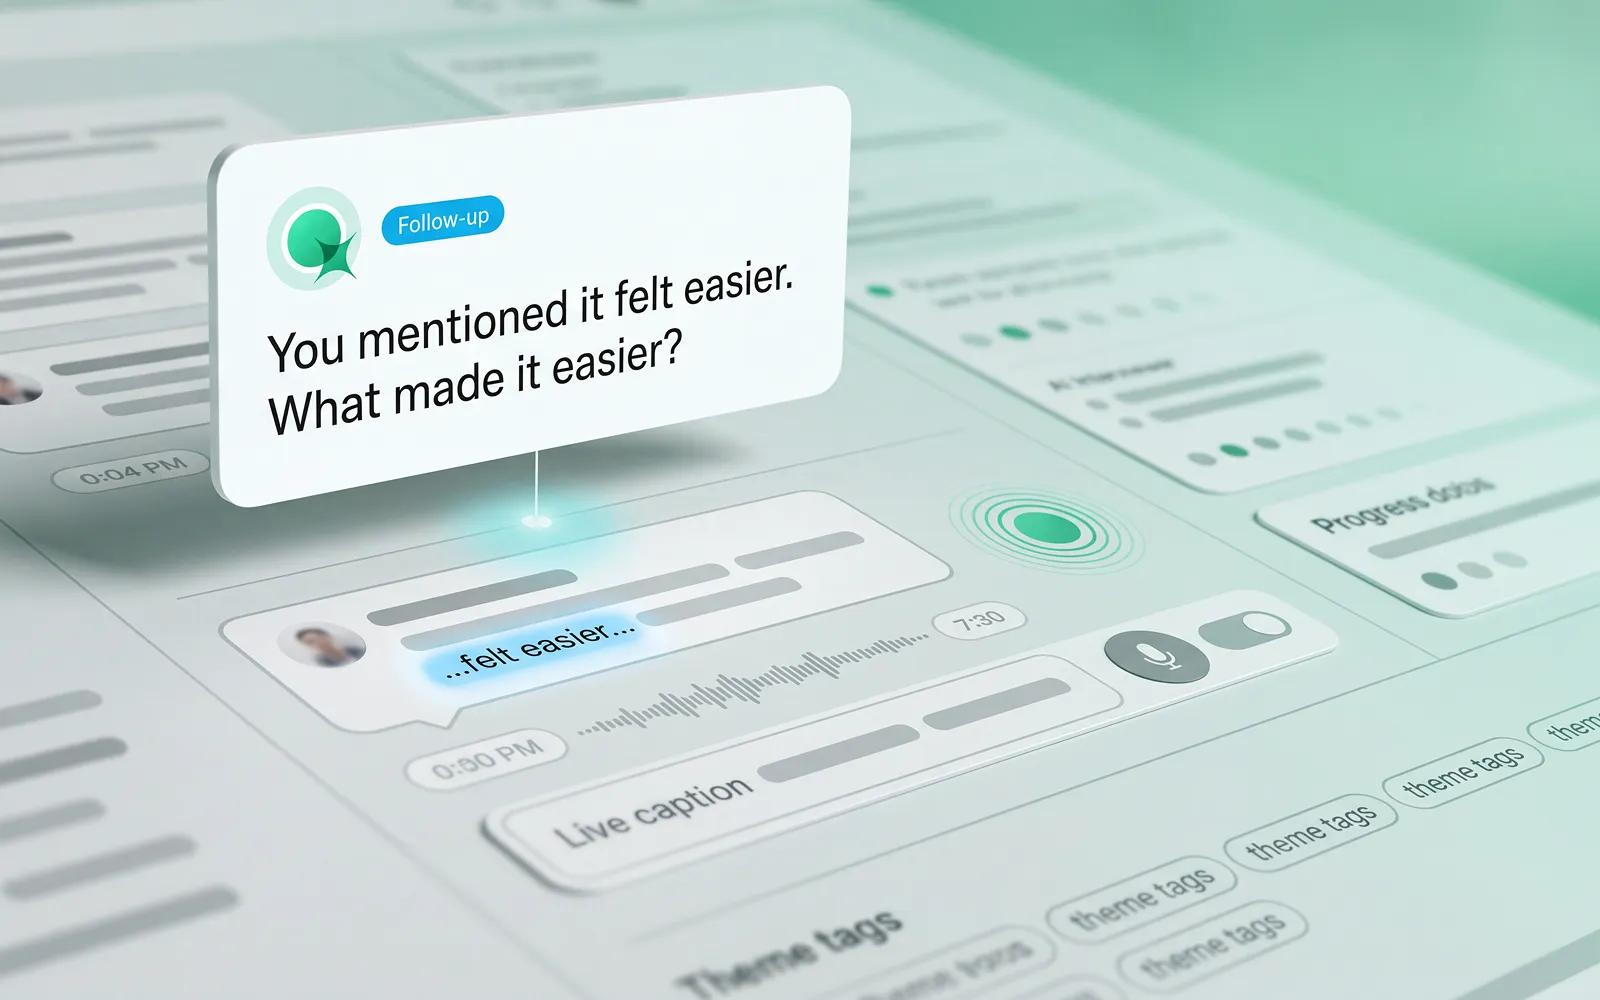
AI is opening up new possibilities for qualitative research. But for researchers, it’s not enough for an AI Interviewer to ask relevant questions. An effective AI Interviewer needs to create an experience where participants feel comfortable sharing their perspectives, have the space to explain their thinking and explore their answers in more depth.
To find out more, we ran a study using Optimal’s AI Interviewer to look at general attitudes towards AI, better understand what participants valued about an AI Interviewer experience, and what worked well and where they saw room for improvement.
One theme stood out: the value of AI interviews depends not just on the technology, but on the experience it creates for the people taking part.
As AI becomes more familiar in everyday life, the conversation is shifting from whether people will use it to when, why and under what circumstances they find it useful. In a survey of 1,005 US consumers led by Adobe Express, 61% said they were comfortable having conversations with AI-powered systems.
Another survey of more than 1,000 participants across six countries found that people who knew they were interacting with AI reported satisfaction rates 34% higher than those who weren't informed.
These findings suggest that interacting with AI isn't inherently uncomfortable for everyone. But comfort with AI doesn't automatically translate into a positive research experience. A quick customer-service interaction is different from a qualitative research interview, where people need to reflect on their experiences, explain their reasoning and sometimes share sensitive or complicated perspectives.
For researchers, the more useful question is: what makes an AI-led conversation feel comfortable, natural and valuable for participants?
In qualitative research, the quality of the conversation matters just as much as the number of responses collected.
A good AI-moderated interview should give participants the freedom to express themselves in their own words, ask relevant follow-up questions and create opportunities to explore an answer beyond the initial response, and go beyond simply moving people through a series of questions.
Here are considerations that stood out from participants interacting with Optimal’s AI Interviewer for the first time.
Qualitative research aims to uncover the reasoning behind people's choices, not just capture their first response. Relevant follow-up questions can encourage participants to elaborate, clarify an opinion or explore an experience in more depth. The ability to answer in their own words, rather than select from predefined options, is also central to gathering richer feedback.
In our study, the majority of participants described their experience with Optimal’s AI Interviewer as “seamless,” “smooth”, “natural”, and even "fun". Several were pleasantly surprised by how the interaction felt, including participants who had reservations beforehand. One participant said, "I have no problems speaking freely."
Automated highlight reel: "The overall experience was widely rated as positive and enjoyable"
On participant remarked, "It was pleasant and I enjoyed it. And you were great." Others described the AI interview format as something they had “come to expect,” framing it as routine rather than novel.
Automated highlight reel: "Overall satisfaction with the AI interview experience was high"
These responses offer an encouraging perspective on what AI-moderated research can feel like for participants with the right cadence and context. Multiple participants also highlighted that the AI Interviewer’s replies were clearly based on what they had just said, rather than following a rigid script.
One participant noted it felt like talking to a real person because responses were grounded in their own words: "I really felt like I was talking to a real person and that the responses were based off of what I what I said."
Automated highlight reel: "Contextual follow-up questions made the conversation feel natural and responsive."
Another participant highlighted how the AI concisely summarized their points before moving on, without asking the same question in different ways — something they’d found frustrating when using other AI interview tools.
People are more likely to engage when they understand what to expect and feel comfortable taking part. Several participants found the AI interview easier to talk to than a traditional interview. For some, the absence of a human interviewer reduced the pressure of the interaction, making it easier to share their thoughts.
Automated highlight reel: "Talking to an AI felt easier than a live human interview"
The experience wasn't just about how the conversation sounded either. Participants also found the on-screen text helpful for following along with the spoken interaction. One participant who experiences auditory processing difficulties specifically highlighted this as a useful accessibility feature.
These observations suggest that small details in the participant experience can make a meaningful difference. Clear instructions, the ability to follow a conversation in more than one way, and a format that feels comfortable can all help people engage with a study.
One participant noted that they felt a person would more deeply grasp the feelings and emotions behind their answers, but overall rated their experience with the AI Interviewer positively.
Comfort will vary by person and research context, so the goal isn't to assume AI moderation will suit everyone and every situation, but to provide another considered way for people to share their perspectives.
A positive AI interview experience doesn't mean every participant will prefer the same format.
With Optimal’s experience, participants appreciated the ability to choose a preferred conversational style that works best for them. One participant, who preferred greater control, initially chose the “submit response” mode. This allowed them to decide when to submit an answer and move on to the AI Interviewer's next question or follow-up.
After a positive experience with the AI Interviewer, they said they would be willing to try the “free form” option. In this mode, the AI Interviewer responds naturally when the participant finishes speaking. This highlights the value of offering choice and helping participants gain familiarity and comfort.
Clip: New comfort and willingness to try "free form"
For UX research, design, and product teams, AI Interviews offer another option for gathering qualitative feedback, creating more flexibility in how conversations take place, and supporting gathering evidence at scale.
The opportunity isn't to replace the human aspect of research. It's to give researchers more ways to listen, learn and make informed decisions.
Ready to explore AI interviews? Get in touch for a demo or find out how to access Optimal’s AI Interviewer in Early Access.

Recruiting B2B participants is harder than recruiting consumers, and the gap is wide. Decision-makers are scarce, gatekeepers are real, and generic panels rarely reach the job titles you need. The good news: a structured, multi-channel approach consistently works.
Consumer research has a ready supply of willing participants. B2B research does not. The people you need, e.g. procurement leads, IT directors, operations managers, finance executives, are exactly the people who have the least spare time and the most filtered inboxes.
Gatekeepers are a structural problem. Executive assistants, spam filters, and company email policies all block outreach before it reaches the right person. Gartner research shows 73% of B2B buyers actively avoid suppliers that send irrelevant outreach – a dynamic that applies equally to research recruitment. If your first contact feels like a sales pitch, the door closes.
Response rates for B2B surveys and studies have also declined over time. Busy professionals receive more outreach than ever, and the bar for what earns a reply keeps rising. That makes the quality of your approach more important than the volume of contacts you reach.
The hardest participants to recruit are rarely hard to find because of their job title alone. The real difficulty sits one layer deeper: behavioral and firmographic complexity. A finance manager is not a useful targeting label on its own. A finance manager who actively uses invoicing software to manage vendor payments for a team of 20 is. Small business owners are another example; add a revenue tier to your criteria and your incidence rate drops sharply. These layers matter, and ignoring them produces a sample that looks right on paper but fails in the room.
No single channel fills a B2B research pipeline on its own. The teams that recruit consistently well use several channels at once and rotate based on what each study needs.
LinkedIn is the most direct route to specific job titles and industries. You can filter by seniority, company size, sector, and geography, and then reach out with a short, personalised message that explains exactly what the study involves and what you're asking of them. Keep the ask small in the first message. Invite them to a two-minute screener, not a 60-minute interview. The lower the initial commitment, the higher the reply rate.
Trade associations, Slack communities, and industry forums often have members who are genuinely interested in contributing to research that improves their field. A well-placed post in the right community can outperform hundreds of cold emails. Find the communities where your target participants already gather and ask moderators about appropriate ways to recruit.
Your existing customers and past participants are an underused recruitment channel. A warm referral from a peer carries far more weight than a cold message from a stranger. Build referral into your study design: after each session, ask participants if they know one or two colleagues who fit your profile. Offer a small bonus for successful referrals. This compounds quickly across a research program.
Some platforms maintain curated panels of verified B2B professionals. These panels charge a premium over consumer panels, but they save weeks of sourcing time and reduce the risk of fraudulent or unqualified participants. When evaluating a panel provider, ask specifically how they verify job titles and company information - not all B2B panels apply the same rigour.
Many UX research platforms have built-in recruitment offerings that remove the sourcing problem entirely. Instead of building a B2B pipeline from scratch, you tap into a panel already vetted for the firmographic and behavioral detail B2B studies need. Some platforms, like Optimal, also offer specialized recruitment and will help you source hard-to-reach participants, or if you are recruiting for moderated research. This is especially helpful if you have criteria that goes beyond demographic and firmographic criteria.
The advantage isn't just speed. Handling recruitment, screening, and research in one place removes the handoff friction of juggling separate tools and you'll get an additional layer of quality assurance from the platform itself. This typically creates a smoother experience for participants as well.
When evaluating this option, look for the same rigor you'd expect from any specialist panel; verified job titles, current company information, clear screening criteria, plus the convenience of running the whole study in a single workflow. You can also ask the platform directly about their audience size for a specific segment and cost estimate as part of the evaluation.
Some roles are genuinely hard to reach through any standard channel. C-suite executives, highly regulated professionals (healthcare, finance, legal), and senior buyers in niche industries need a different approach.
Understanding the ecosystem around a target participant is as important as knowing their title. If you're recruiting finance managers who evaluate invoicing tools, your outreach should reflect that specific context, not just their seniority or sector. The more precisely you understand what they do and which tools they rely on, the more relevant your message feels, and the more likely they are to respond.
Hard-to-reach professionals respond to relevance. If your outreach message leads with what they'll get – a summary of findings, a chance to shape a product they use, a peer benchmarking report – you shift the dynamic from "favour request" to "professional exchange." Frame the study as something worth their time, not something you need from them. Be upfront about the time commitment too. Transparent communication about how long the session runs and exactly what it involves increases willingness to engage, especially among senior participants who guard their calendars closely.
A cold message to a VP of Procurement has a low hit rate. A message from someone they already know has a much better one. Map your internal network; sales, customer success, account management, and identify who has existing relationships with the profiles you need. A brief internal email asking for an introduction often works faster than any external outreach.
Specialist B2B recruiters maintain databases of professionals in specific industries and roles. Some research recruitment agencies focus exclusively on hard-to-reach segments, such as senior executives, regulated industries, enterprise buyers. Their networks take years to build and are genuinely difficult to replicate through DIY outreach alone.
Timing matters more in B2B than in consumer research. Avoid outreach on Monday mornings and Friday afternoons. Mid-week, mid-morning tends to produce the best reply rates. For senior roles, budget and planning cycles also affect availability. For instance, a CFO is easier to reach in a quieter quarter than during year-end close.
Recruiting the wrong participants wastes everyone's time and produces data you can't use. A well-designed screener is the most important quality control tool you have.
The biggest risk with screeners is leading participants to the right answer. When someone suspects what you're looking for, they'll guess their way through. The fix is to write questions that surface behavior indirectly. Instead of asking "Do you shop at Amazon?" ask participants to list all the online retailers they've visited in the past month. You get the same signal without telegraphing what qualifies. The same principle applies in B2B: instead of asking "Are you responsible for software purchasing decisions?" ask "Which of the following best describes your involvement in evaluating new tools for your team?" - then list options that include both qualifying and disqualifying answers.
Defining your criteria precisely before you write a single question is equally important. Job title alone is rarely enough. For small business owners, you may need to specify a revenue tier - and that extra layer will reduce your incidence rate. For software-adjacent roles, you may need to confirm which specific tools a participant actively uses. Know those requirements going in, or your sample will drift.
Check for consistency. If someone claims to be a Director at a 500-person company but also says they have no budget authority, that's a flag worth following up on. A short phone screen before a longer session catches most of these cases early.
Incentives that work for consumer panels often fall flat with senior B2B professionals. A $50 gift card is meaningful to a general consumer but barely registers for a Director earning a six-figure salary. The wrong incentive doesn't just fail to attract, it signals that you haven't thought carefully about who you're asking.
Be transparent about incentives upfront. Burying the compensation detail at the end of a screener reduces completion rates and creates friction.
Offer a wide range of session times, including early morning and late afternoon slots. Use a self-scheduling tool so participants can book without email back-and-forth. Every extra step in the scheduling process loses participants - especially busy professionals who won't chase a researcher to find a time.
Recruiting hard-to-reach B2B participants takes more effort than consumer recruitment - but the effort is predictable and manageable with the right approach.
The teams that recruit well don't just find participants - they build relationships that make the next study easier. Start with the channels closest to your existing network, then expand outward as your program grows.
Ready to run your next B2B study? Talk to sales to find the right plan for your team and learn more about Optimal's recruitment capabilities.
.webp)
Research data becomes even more valuable when it can be used alongside the other data your business relies on.
The Optimal API gives organizations secure, read-only access to their Optimal research data, so you can connect research with the tools and workflows your teams already use. Bring research data into a data warehouse, build dashboards, automate reporting, or combine research results with product analytics and business metrics.
Instead of manually exporting research data or relying on static reports, you can create a more connected way to access and use your research at scale.
The Optimal API is a secure, read-only way to access research data from Optimal programmatically. It allows your developers, IT or systems administrators, and API or integration managers to connect Optimal with other business systems.
For example, you can use the API to:
As research programs grow, manually exporting and combining data can become time-consuming. Connecting research data to your existing data infrastructure can make it easier for teams to find, analyze, and share research across the organization.
For example, a research team could send Optimal data to Snowflake and combine it with product analytics. A research operations team could build a centralized dashboard showing research activity across teams. A data or analytics team could automate recurring reports instead of relying on researchers to export data manually.
The API helps make research data more accessible beyond the research team.
The initial release of the Optimal API provides read-only access to:
This means you can retrieve research data from Optimal without changing or deleting it through the API.
Depending on how your organization manages technology and integrations, the person setting up access to the API might be a:
You don't need to be the person building the integration to create the API application. The organization admin is responsible for creating the application and securely sharing its credentials with the appropriate person.
Your Client Secret works like a password for your API application. Treat it as sensitive information and only give access to people or systems that need it.
Follow these best practices:
The Optimal API makes it possible to bring research data into the systems your organization already relies on.
Whether you're building a research repository, connecting research to business intelligence, automating reporting, or combining research with product data, the API can help reduce manual data handling and make research easier to use across your organization.
The Optimal API is now currently available to multi-team organizations on Enterprise plans.
.avif)
Over the past year, we've spoken to more than a hundred people about the challenges of running interviews and moderated research.
In a study of 90 researchers, designers, and product owners, 61% said they regularly conduct structured one-on-one interviews. Interviewing is still one of the most valuable methods available, but it still runs into challenges and barriers.
Modern product teams are moving faster than ever, fueled by automation and AI, and research is expected to keep up. But sourcing, screening, scheduling, and managing participants can still slow everything down. Teams need a faster, more scalable way to find qualified participants without trading away quality. Teams need a faster, more scalable way to find qualified participants without sacrificing quality.
And while speed matters, teams told us something equally important: predictability and visibility. You want confidence that recruitment is progressing, participants are being vetted appropriately, and interviews will happen as planned.
With Optimal Interviews, you can already schedule sessions, automatically record interview sessions, get automated insights and highlight reels, chat with AI, and store your findings in a central repository. Now moderated recruitment is part of that same flow.
Everything lives in Optimal. The result is less admin, fewer handoffs, more visibility and control over your participants, and a smoother path from research question to actionable insight.
In this next evolution of recruitment at Optimal, moderated recruitment gives teams greater visibility and control throughout the entire recruitment process.
The Participant Management tab becomes your central hub for moderated recruitment. From here, you can:
Instead of wondering where recruitment stands, you'll always have a clear view of progress.
As participants apply, you can review potential participants and determine who is the best fit for your study. Each applicant profile includes:
Get everything you need to make an informed decision. Review individual participant profiles, assess their suitability, and add notes. Choose your best match for your study, and maintain full control over who enters their study.
Need to follow up with applicants or confirm details before scheduling? Send messages directly from within the platform, no inbox-hopping required.
Confirmed interviews are automatically added to your Optimal Interviews schedule, reducing admin and helping you stay organized. Everything works alongside your existing integrations so you can easily:
The result is a connected workflow that reduces friction from recruitment through to analysis.
Research teams are under increasing pressure to deliver insights quickly while maintaining rigor and participant quality. Moderated Recruitment helps strike that balance.
By bringing screening and targeting, participant management, scheduling, interviewing, recording, and insight management together in one platform, teams can spend less time coordinating logistics and more time focusing on insights.
Whether you're conducting customer discovery, concept testing, or usability interviews, Moderated Recruitment helps you move from recruitment to insight faster, with visibility, control, and confidence.
Ready to see it in action? Explore Moderated Recruitment in Optimal Interviews.
Log in to see how it works or book a demo to learn more.

Was human-centered design all wrong?
No, but it fails to capture the whole picture.
Don Norman introduced human-centered design (HCD), the approach of putting people and their needs at the center of the design process, in the 1980s and almost 50 years later at DDX San Diego 2026, he challenged the philosophy.
Human-centered design gave the industry an important shift in perspective, paying close attention to the people who would actually live with what we create, but there’s tension. Design can create tremendous value for people while also creating unintended consequences for cultures, communities, organizations, and the world around them.
If we optimize for the person in front of us, what happens to everyone and everything outside the frame?
And as technology becomes increasingly agentic, that broader view becomes even more relevant. We're no longer designing only things that people interact with. We're increasingly designing systems that can act, make decisions, and influence what happens next.
Life-Centered Design (LCD) expands the focus from the individual user to the larger living system that the product or service exists within. It seeks to align design decisions with global goals such as the United Nation’s Sustainable Development Goals.
Intelligence-Centered Design (ICD) and Human-Agent Centered Design (H-ACD) are extensions of HCD where AI plays an active role in the design process alongside human intelligence, each learning from, making decisions, and mediating the process.
Agent-Centered Design (ACD) puts AI agents at the center as the primary participant in the process, agents building for agents.
Good experiences have always started with deep understanding of the people who use the product, service, or system. Needs, expectations, and priorities are shaped by environment, so what works in one market, organization, or culture can't automatically be treated as a universal truth for all.
That's why ethnography and other forms of contextual research remain so valuable. Before asking what we should build, we need to understand the world people are navigating.
Questions to ask:
The discipline of understanding people hasn't gone anywhere. It's just being asked to stretch further, to the systems, risks, and impacts beyond individuals.
Behavior is shaped by systems, organizational structures, constraints, and the decisions made around you, so those factors are part of what we are designing for. Agentic AI makes this deep understanding of context even more important.
When AI can act, make decisions, and influence what happens next, it becomes a key part of the system. Therefore, design has to account for the relationship between humans and their agents including how they work together, what artifacts are created along the way, how do they communicate, what decisions does AI make and what are its responsibilities.
Questions to ask:
One practical takeaway is to spend more time understanding what people actually do, not just what they say they do. Diary studies, observation, prototype testing, and live site testing can all help surface what people may not be able to articulate themselves. Rather than simply asking “why,” ask, “What drove you to make that decision?” This is an open question to prompt an honest explanation of what influenced their thinking and led them to take a certain action.
Design has no shortage of frameworks, methodologies, books, and white papers. While these give us useful ways to think, real change only happens when teams transform what they’ve learned into something tangible. In the end, impact isn't measured by the depth of your knowledge, but by what you actually create with it.
Question to ask: What's the smallest thing I could do to build or test this idea this week?
A simple prototype will reveal insights that hours of discussion never could. A real interaction exposes the hidden gaps between what people say and what they actually do. A quick experiment tells a team far more than another round of debate.
At its best, good design thinking must always lead to good "design doing."
Research and design often sits in the middle of an organization. Leadership sets direction, research gathers insight, design shapes the experience, then implementation follows. When each function speaks a different language, intent can get lost along the way.
Designers and researchers are inherently connectors. We bring together different perspectives, make sense of complexity, and help people see how decisions affect one another. But we aren't often in the room when the decisions themselves are being made. Policy, process, business models, and organizational structures are all forms of design, yet designers are often brought in after those choices have already been made.
There is an opportunity and a need for design thinking and "design doing" to move further upstream, and that starts with speaking the language of the people making those decisions: finances and margins.
Questions to ask:
Business decisions are design decisions.
The next era of design is expanding what we consider when we design.
As systems become more autonomous, designers have an opportunity to shape not only experiences, but the policies, services, and the systems around them.
The future of design is less about finding the right framework and more about what we choose to do with what we know.
Our monthly newsletter, User Tested is for product, design, and research teams who want to make UX research a strategic accelerator. Subscribe to User Tested.
.webp)
We are delighted to announce that Optimal has been named as a supplier on Government Commercial Agency's (GCA) G-Cloud 15 framework, making our full research platform available to public sector teams across central government, local authorities and the NHS.
GCA is the UK's central commercial and procurement organisation, connecting public and private sectors to achieve the best outcomes for the UK and its citizens. GCA uses its commercial expertise to create a simpler procurement experience that redirects valuable resources into essential public services – creating value for the nation.
Optimal is listed under Lot 2b: Software as a Service (SaaS), where public sector buyers can access our UX Research Platform – a self-service, cloud-hosted platform covering usability and prototype testing, interviews, live-site testing, surveys, card sorting, tree testing, first click testing, and built-in participant recruitment.
As a GCA supplier, Optimal can be procured by government teams through the same framework they already use, without new supplier onboarding or a separate tender process. G-Cloud is how the UK public sector buys cloud software, so for research and service teams working under tight timelines and Cloud First policies, being listed removes a step that usually slows things down.
This isn't Optimal's first time supporting public sector work. Optimal is used by government and public sector teams around the world, including across the UK.
When the NHS team needed to turn Covid-19 guidance into clear, accessible information at national scale, they turned to Optimal – recruiting 100 research participants within 48 hours and moving from concept to launch in four weeks. The resulting Covid-19 information hub served approximately 80 million visitors at its peak.
That's the kind of pace public sector teams need, and it's what Optimal is built for.
Optimal is an enterprise, end-to-end research platform supporting the full range of UX research and testing methods government teams rely on: usability and prototype testing, interviews, live-site testing, surveys, card sorting, tree testing, first click testing, mixed methods and qualitative insights. Participant recruitment is built in, with access to multiple panel providers to find niche and hard-to-reach audiences – the specific communities, first-time service users and specialist groups that public sector research so often depends on.
It's everything a government research or service team needs, from early discovery through to live service, in a single platform rather than a patchwork of separate tools.
Optimal complies with the requirements of the Cyber Essentials scheme, the UK government-backed certification that validates foundational security controls across firewalls, secure configuration, access control, malware protection, and patch management. Independently assessed by an IASME-certified assessor and certified across our whole organisation since September 2026, this recognised standard gives our customers, partners, and stakeholders confidence in how we protect our systems and handle their data.
Alongside Cyber Essentials, Optimal holds ISO/IEC 27001 for information security and ISO/IEC 27701 for privacy, and maintains a SOC 2 Type II report on our controls. Data is encrypted in transit and at rest, and our infrastructure is penetration-tested annually by independent auditors. You can review all of our certifications in our security center.
For information governance teams, that means the security review is largely done before the conversation starts.
Public sector teams can find Optimal’s Digital Marketplace listing, or talk to us directly about working with your team.
