Subscribe to OW blog for an instantly better inbox
Oops! Something went wrong while submitting the form.

This is Part 2 of our series, The System Behind Better Content, co-authored by Content Design Hub. You can read Part 1 here.
A content spec is a structured, testable document that defines how content should look, sound, and behave across a product, built from real user research so your team (and your AI tools) have a shared set of rules to work from. In Part 1, we showed you how you can create a content spec and what it might look like, but having the spec is only half the work. A document sitting in a folder doesn't change anything on its own, it has to be operationalized to earn its place in your workflow.
A content spec only delivers value if the whole team uses it. The spec makes that possible. If it’s in the spec, anyone can check against it. That includes product managers writing acceptance criteria, engineers writing automated test cases, and QA testers checking final screens.
A spec needs to be embedded in the places where decisions happen. This could be your team’s:
The key is to keep the spec visible to your teammates and easy to reference wherever your team works, including the AI tools your team uses.
When AI tools generate content, they use their training data, but much of the publicly available digital content used to develop AI systems is disproportionately produced in Western and North American contexts. These perspectives differ from the lived experiences, cultural contexts, and perspectives of the users you are designing for.
Without a spec grounded in user research, AI writing tools can produce content that is grammatically correct and seemingly polished, but culturally misaligned.
For an Australian student finance app, that might look like:
These are not AI trivial errors. Nor are they hallucinations. AI got these terms correct, but for a different audience.
When content is not localized, you may not only alienate your users, but also create anxiety and erode trust. In a regulated industry like financial services, it can also create compliance risk.
A content spec is one of the most effective prompt engineering assets your team can have. Prompt engineering is the practice of writing precise and reusable instructions that guide AI tools to produce consistent and predictable outputs.
When you feed your spec rules into an AI prompt, you give the model the guardrails so it doesn’t fill in the blanks and default to its training data.
Role
You’re a content designer writing for a money management app aimed at Australian young people aged 18 to 24.
Context
Users may be managing money independently for the first time. They are familiar with informal language but need to learn formal financial terminology as part of using the app. Australian financial, tax, and welfare systems have specific terms that differ from other English-speaking countries.
Task
Write content for the app onboarding flow. Users will experience this flow when they sign up for the first time. The flow includes the welcome screen and account setup steps. It’s the first time a user will encounter key financial concepts like superannuation, HECS-HELP, and Centrelink payments. Each screen should introduce one concept at a time, explain it in plain English, and tell the user what action to take next.
Output
Screen-by-screen onboarding content, including headings, body copy, and button labels. Keep all sentences under 20 words. Each screen should have one heading, no more than 3 sentences of body copy, and one call-to-action.
Constraints
Use the content spec to guide your content decisions.
Use the acceptance criteria and user story to guide your deliverables.
Key rules include:
Validation
Before finalising any content, check it against the content spec. If a term does not appear in the approved list, flag it for review rather than substituting a synonym.
Confirmation
Before you draft the content, confirm you can:
With these prompt rules, your AI tool has a strong starting point and will give you a better first draft.
The spec also helps teams evaluate AI output consistently. Instead of asking, “Does this sound right?’, you may question, “Does this align with our rules?”
Courses like AI Prompt Engineering for Content Creators can be a useful way to learn how to write effective AI prompts grounded in content design principles.
A content spec is a living system that connects user research to design decisions, team workflows, and AI tools. It's like a muscle; the more you use it, the stronger it gets. The more you add to it, the more accurate, reliable, and valuable it becomes.
Here's the full spec cycle:
The content spec keeps your product human. It's rooted in research and reflects the context of your users; how they think, speak, and make sense of the world.
AI is now a standard part of content workflows. This means that the spec is no longer optional and is no longer just an engineering tool. Without a content spec, AI tools default to someone else's language, someone else's culture, and someone else's assumptions.
Product teams that invest in a content spec now are building a system that scales, learns, and most importantly, keeps the user at the centre of every decision.
Start with research. Build the spec. Keep your users in every decision.
Meet with us to learn how teams are using Optimal to transform interviews into insights and create content that truly connects.
This is Part 1 of our series, The System Behind Better Content, co-authored by Content Design Hub.
This piece is a collaboration between Optimal and Content Design Hub, exploring how a content specification, or “content spec”, grounded in user research can give your team and AI tools the guardrails they need to create appropriate, consistent, and user-centered content at scale. A content spec ensures your content is structured the way your users think, making it easier for them to find what they need, understand it, and take action.
Words and language are core to product design. Like any design decision, content needs a specification that gives your team—and your AI tools—the rules for creating consistent, user-centered content. This is known as a content spec.
A content spec is a structured document that defines how content should look, sound, and behave across a product.
There are 2 types of content specs:
Content spec: a structured, testable document that defines content rules, guidelines, templates and behaviours. It allows design teams to create repeatable content patterns that are consistent and can scale across different products and channels.
At a small scale, vague content guidance is manageable. You can run tests to validate your decisions, and you can make changes on the fly. However, when you’re working on products within a larger system, without a spec, your content won’t scale (with humans or AI).
How to identify that your content is not scalable:
Engineers solved this problem decades ago. Engineers work from specifications so that anyone on the team can build the same thing the same way. Content design needs to make the same shift.
A content spec is the missing piece in most content design systems. And, it all starts with user research. Let us walk you through how to build, use, and maintain it.
“Content is not a finishing touch; it’s the foundation of all digital products.” – Content Design Hub.
The content spec starts with research. Before you create a standard or pattern, you need to understand who your users are and what they need. That's the difference user research makes. It shows you how users really talk about their problems and needs, in their own words, so you can build the right solution and write content that sounds like your users.
Here’s an example:
An Australian bank is building a money management app for young people aged 18 to 24. The app will help users track things like part-time income, savings, debt and scholarships. It aims to improve financial literacy and planning.
Financial terminology is shaped by a country's legal, regulatory and tax systems. We can’t always simplify or eliminate those terms like “Low Income Tax Offset” (tax reduction) and “HECS-HELP” (student loan scheme), but the content should make them understandable and help users navigate confidently
Terms all need to appear in the right context and with the right explanation.
Before any content is written, the team runs discovery research. This is the input layer for the content spec. It will give your team the evidence base that everything else is built on.
The research mix might include:
Discovery research surfaces answers to four foundational questions that will guide your approach to content spec design:
While these findings are genuinely interesting, they are also the raw material of your content specs.
Once you have your research findings, the next step is to turn them into explicit, testable rules. This phase is where a content spec becomes distinct from a style guide.
A content spec is a working document that defines:
There is a differentiation between a content style guide and a content spec. Most content style guides are broad and aspirational, not specific. A style guide has good principles, but they are not necessarily rules AI can consistently apply or test against.
Here are two of the same rules, but expressed differently in a style guide and a content spec.
Our tone of voice is warm and helpful.
Our tone of voice is warm and helpful.
We:
Example:
Do not write: ‘Your application has been received and is pending review.’
Write: ‘We've got your application. We'll let you know within 2 business days.’
Exceptions:
This tone does not apply to terms and conditions, privacy policy, or legal disclosures. These sections must follow the language required by Australian financial services regulations and cannot be rewritten for style. Content that introduces this information must be written in plain language (words 2 syllables or less, with definitions of complex words).
A content spec is most useful when it lives in a format that both humans and AI can read. You have three options to either store or export as your content spec.
For product teams, writing in these formats may seem a bit alien. So that’s where you can draft your rules as a .txt file or in a Word Document and then export it as a Markdown file.
The format you give AI is important because AI reads plain text more reliably. A Word Document or PDF file has layers of code that can interfere with how AI tools parse (extract) content.
Adding research findings to a content spec removes the barrier between user research and product decision-making.
Instead of a product manager checking abstract rules, they can trace a rule back to the user insight that generated it. This approach gives everyone in a team more context into how and why decisions are made. And of course, all these decisions are tied back to the user.
You can easily create a content spec using MCP and your working document. Connect your research repository to your preferred AI tool (such as Claude, ChatGPT, or Cursor) and use MCP to pull relevant insights and evidence directly from your research. From there, build a structured content spec that can live in different workspaces and tools for easy reference.
Participants aged 18 to 25 were given 30 cards covering financial concepts. A product team asked the participants to group the concepts and name each group in their own words.
Findings:
Insights:
A content spec built from real research gives your team a shared source of truth, but a document sitting in a folder doesn't change anything on its own. The value comes from operationalizing it.
In Part 2, we cover how to operationalize a content spec in 2026 so it actually gets used. You'll get example prompt rules to help you craft guardrails for your AI tool to help you produce consistent draft content.

In today's rapidly evolving utility landscape, artificial intelligence presents unprecedented opportunities to transform customer engagement strategies. However, as UX professionals in the energy and utilities sector, it's crucial to implement these technologies thoughtfully, balancing automation with the human touch that customers still expect and value.
The energy and utilities sector faces unique challenges: managing peak demand periods, addressing complex billing inquiries, and communicating effectively during outages. AI can help address these challenges by:
While AI offers significant advantages, implementation requires careful consideration of when and how to deploy these technologies:
As you consider integrating AI into your customer engagement strategy, keep these guidelines in mind:
Optimal's user insights platform can be instrumental in ensuring your AI implementation truly meets customer needs:
Before implementing AI-powered self-service options, use Tree Testing to validate your information architecture:
When determining which tasks should be handled by AI versus human agents:
For AI-enhanced customer portals and apps:
Gather crucial insights about customer comfort with AI:
During the ongoing refinement of your AI systems:
When developing AI-powered customer interfaces for utilities:
As AI capabilities continue to evolve, the most successful utility companies will be those that thoughtfully integrate these technologies into their customer engagement strategies. The goal isn't to replace human interaction but to enhance it, using AI to handle routine tasks while enabling your team to focus on delivering exceptional service where human expertise, creativity, and empathy matter most.
By taking a balanced approach to AI implementation, supported by robust UX research tools like those offered by Optimal, UX professionals in the energy and utilities sector can create more responsive, personalized, and efficient customer experiences that meet the needs of today's consumers while preserving the human connection that remains essential to building lasting customer relationships.
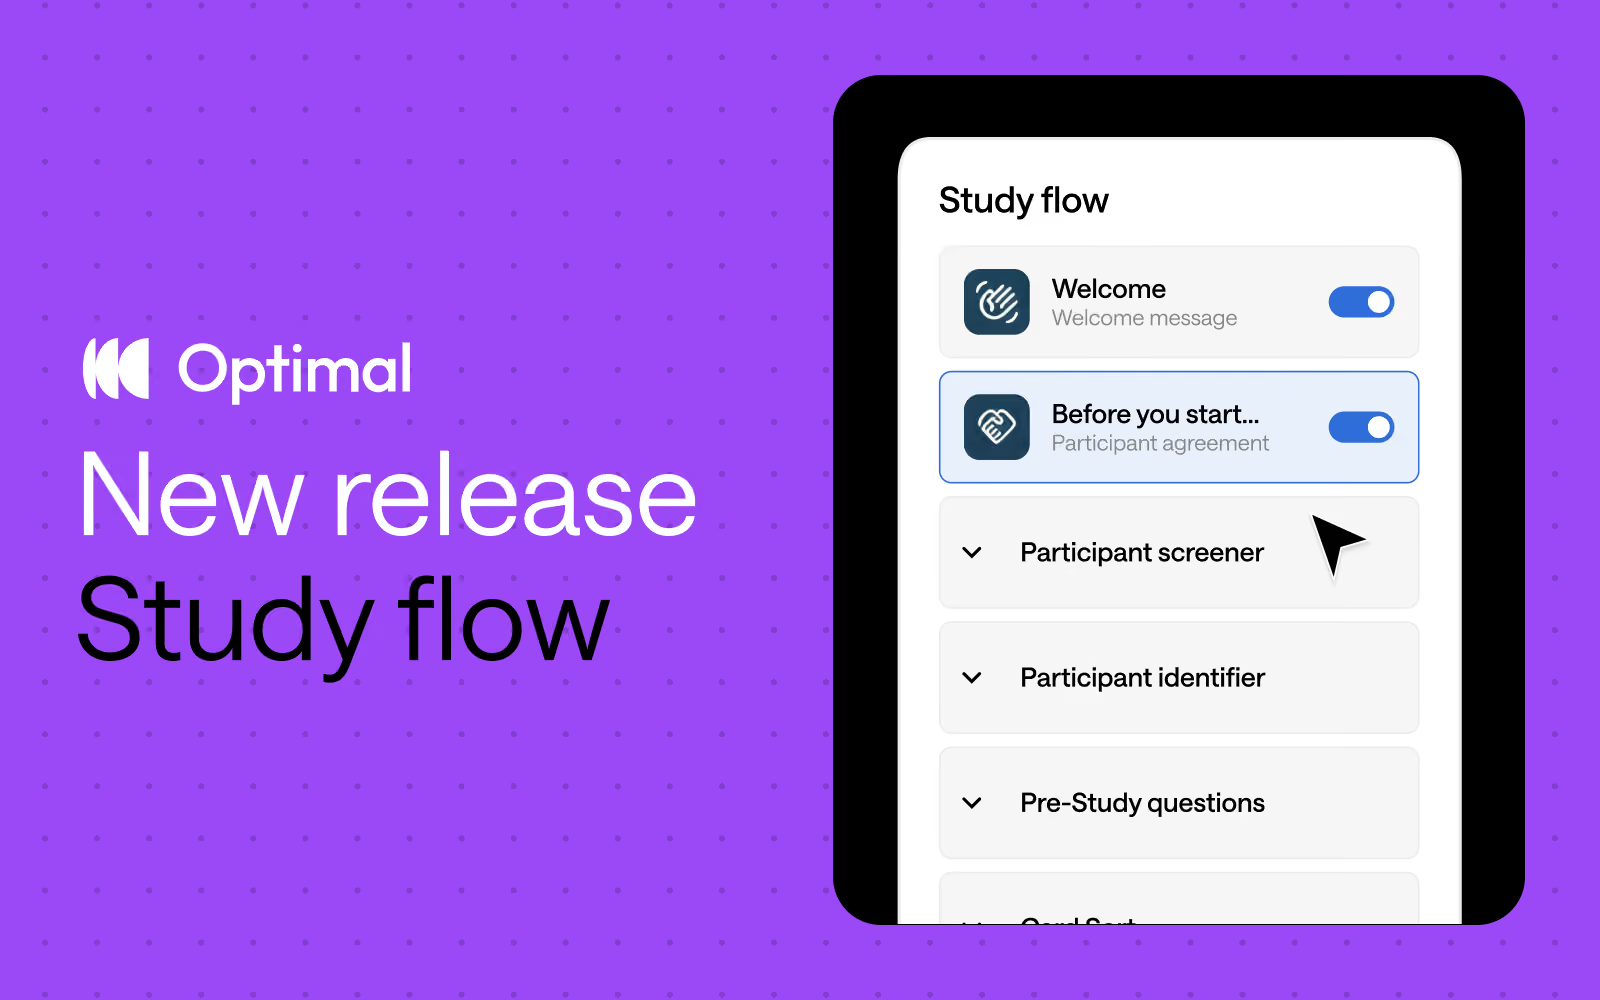
Inspired by insights from Optimal users, we’ve reimagined study creation to bring you a beautifully streamlined experience with the new Study Flow tab.
⚡ Enjoy faster study set up: Messages & instructions and Questionnaire tabs are combined in a single tab - called Study Flow - for faster editing and settings customization.
✨ See it all at a glance: Easily visualize and understand the participant experience—from the welcome message to the final thank-you screen—every step of the way.
🎯 Duplicate questions: Save time and quickly replicate questions for surveys, screening questions, and pre- and post-study questions.
⭐ Experience enhanced UI: Enjoy a modern, clean design with intuitive updates that minimize scrolling and reduce mental load.
🗂️ Collapse and expand sections: Easily navigate studies by collapsing and expanding sections, making it easier to build out specific parts of your study.
This Study Flow tab is available across all Optimal tools, except for Qualitative Insights.
We’re not stopping there. We have some significant improvements on the horizon designed to give you even greater flexibility and control.
Advanced logic: Enhanced logic capabilities is one of our most highly requested features, and we’re thrilled to introduce new capabilities to help you build your ideal study experience – available for surveys and other tools. We will first introduce “display logic”, allowing for:
Customizable sections: Organize your questions into different sections to build a better study experience for your participants. For example, segment your questions into relevant groupings, such as demographics or product usage. With custom sections, you can add new sections, rename, reorder, duplicate, and move questions between different sections.*
*Note: Questions cannot be moved to/from the screening questions section.
These upcoming features will empower you to create dynamic, tailored study experiences for different audiences with ease for more valuable insights.
Start exploring the new Study Flow now.

User experience (UX) research, or user research as it’s commonly referred to, is an important part of the product design process. Primarily, UX research involves using different research methods to gather information about how your users interact with your product. It is an essential part of developing, building and launching a product that truly meets the requirements of your users.
UX research is essential at all stages of a products' life cycle:
While there is no one single time to conduct UX research it is best-practice to continuously gather information throughout the lifetime of your product. The good news is many of the UX research methods do not fit just one phase either, and can (and should) be used repeatedly. After all, there are always new pieces of functionality to test and new insights to discover. We introduce you to best-practice UX research methods for each lifecycle phase of your product.
While the planning phase it is about creating a product that fits your organization, your organization’s needs and meeting a gap in the market it’s also about meeting the needs, desires and requirements of your users. Through UX research you’ll learn which features are necessary to be aligned with your users. And of course, user research lets you test your UX design before you build, saving you time and money.
One of the best ways to learn about your users and how they interact with your product is to observe them in their own environment. Watch how they accomplish tasks, the order they do things, what frustrates them, and what makes the task easier and/or more enjoyable for your subject. The data can be collated to inform the usability of your product, improving intuitive design, and what resonates with users.
Reviewing products already in the market can be a great start to the planning process. Why are your competitors’ products successful and how well do they behave for users. Learn from their successes, and even better build on where they may not be performing the best and find your niche in the market.
Surveys are useful for collecting feedback or understanding attitudes. You can use the learnings from your survey of a subset of users to draw conclusions about a larger population of users.
There are two types of survey questions:
Closed questions are designed to capture quantitative information. Instead of asking users to write out answers, these questions often use multi-choice answers.
Open questions are designed to capture qualitative information such as motivations and context. Typically, these questions require users to write out an answer in a text field.
Once you've completed your product planning research, you’re ready to begin the build phase for your product. User research studies undertaken during the build phase enable you to validate the UX team’s deliverables before investing in the technical development.
Generally involve 5-10 participants and include demographically similar individuals. The study is set up so that members of the group can interact with one another and can be carried out in person or remotely.
Besides learning about the participants’ impressions and perceptions of your product, focus group findings also include what users believe to be a product’s most important features, problems they might encounter while using the product, as well as their experiences with other products, both good and bad.
Card sorting gives insight into how users think. Tools like card sorting reveal where your users expect to find certain information or complete specific tasks. This is especially useful for products with complex or multiple navigations and contributes to the creation of an intuitive information architecture and user experience.
Tree testing gives insight into where users expect to find things and where they’re getting lost within your product. Tools like tree testing help you test your information architecture.
Card sorting and tree testing are often used together. Depending on the purpose of your research and where you are at with your product, they can provide a fully rounded view of your information architecture.
You’ve launched your product, wahoo! And you’re ready for your first real life, real time users. Now it’s time to optimize your product experience. To do this, you’ll need to understand how your new users actually use your product.
Usability testing involves testing a product with users. Typically it involves observing users as they try to follow and complete a series of tasks. As a result you can evaluate if the design is intuitive and if there are any usability problems.
User Interviews - A user interview is designed to get a deeper understanding of a particular topic. Unlike a usability test, where you’re more likely to be focused on how people use your product, a user interview is a guided conversation aimed at better understanding your users. This means you’ll be capturing details like their background, pain points, goals and motivations.
A/B Testing is a way to compare two versions of a design in order to work out which is more effective. It’s typically used to test two versions of the same webpage, for example, using a different headline, image or call to action to see which one converts more effectively. This method offers a way to validate smaller design choices where you might not have the data to make an informed decision, like the color of a button or the layout of a particular image.
Flick-click testing shows you where people click first when trying to complete a task on a website. In most cases, first-click testing is performed on a very simple wireframe of a website, but it can also be carried out on a live website using a tool like first-time clicking.
If you’ve reached the growth stage, fantastic news! You’ve built a great product that’s been embraced by your users. Next on your to-do list is growing your product by increasing your user base and then eventually reaching maturity and making a profit on your hard work.
Growing your product involves building new or advanced features to satisfy specific customer segments. As you plan and build these enhancements, go through the same research and testing process you used to create the first release. The same holds true for enhancements as well as a new product build — user research ensures you’re building the right thing in the best way for your customers.
User interviews will focus on how your product is working or if it’s missing any features, enriching your knowledge about your product and users.
It allows you to test your current features, discover new possibilities for additional features and think about discarding existing ones. If your customers aren’t using certain features, it might be time to stop supporting them to reduce costs and help you grow your profits during the maturity stage.
Surveys and questionnaires can help gather information around which features will work best for your product, enhancing and improving the user experience.
A/B testing during growth and maturity occurs within your sales and onboarding processes. Making sure you have a smooth onboarding process increases your conversion rate and reduces wasted spend — improving your bottom line.
UX research testing throughout the lifecycle of your product helps you continuously evolve and develop a product that responds to what really matters - your users.
Talking to, testing, and knowing your users will allow you to push your product in ways that make sense with the data to back up decisions. Go forth and create the product that meets your organizations needs by delivering the very best user experience for your users.
"Hi Optimal Work,I was wondering if there are some best practices you stick to when creating or sending out different UX research studies (i.e. Card sorts, Prototyye Test studies, etc)? Thank you! Mary"
Indeed I do! Over the years I’ve learned a lot about creating remote research studies and engaging participants. That experience has taught me a lot about what works, what doesn’t and what leaves me refreshing my results screen eagerly anticipating participant responses and getting absolute zip. Here are my top tips for remote research study creation and launch success!
Screener questions are really useful for eliminating participants who may not fit the criteria you’re looking for but you can’t exactly stop them from being less than truthful in their responses. Now, I’m not saying all participants lie on the screener so they can get to the activity (and potentially claim an incentive) but I am saying it’s something you can’t control. To help manage this, I like to use the post-study questions to provide additional context and structure to the research.
Depending on the study, I might ask questions to which the answers might confirm or exclude specific participants from a specific group. For example, if I’m doing research on people who live in a specific town or area, I’ll include a location based question after the study. Any participant who says they live somewhere else is getting excluded via that handy toggle option in the results section. Post-study questions are also great for capturing additional ideas and feedback after participants complete the activity as remote research limits your capacity to get those — you’re not there with them so you can’t just ask. Post-study questions can really help bridge this gap. Use no more than five post-study questions at a time and consider not making them compulsory.
No matter how careful I am, I always miss something! A typo, a card with a label in the wrong case, forgetting to update a new version of an information architecture after a change was made — stupid mistakes that we all make. By launching a practice version of your study and sharing it with your team or client, you can stop those errors dead in their tracks. It’s also a great way to get feedback from the team on your work before the real deal goes live. If you find an error, all you have to do is duplicate the study, fix the error and then launch. Just keep an eye on the naming conventions used for your studies to prevent the practice version and the final version from getting mixed up!
Something that has come back to bite me more than once is failing to clearly explain when the study will close. Understandably, participants can be left feeling pretty annoyed when they mentally commit to complete a study only to find it’s no longer available. There does come a point when you need to shut the study down to accurately report on quantitative data and you’re not going to be able to prevent every instance of this, but providing that information upfront will go a long way.
You may think you’re setting yourself up to be bombarded with emails, but I’ve found that isn’t necessarily the case. I’ve noticed I get around 1-3 participants contacting me per study. Sometimes they just want to tell me they completed it and potentially provide additional information and sometimes they have a question about the project itself. I’ve also found that sometimes they have something even more interesting to share such as the contact details of someone I may benefit from connecting with — or something else entirely! You never know what surprises they have up their sleeves and it’s important to be open to it. Providing an email address or social media contact details could open up a world of possibilities.
It might seem really obvious, but I can’t tell you how many emails I received (and have been guilty of sending out) that are missing the damn link to the study. It happens! You’re so focused on getting that delivery right and it becomes really easy to miss that final yet crucial piece of information.
To avoid this irritating mishap, I always complete a checklist before hitting send:
First and foremost, before you create or disseminate a remote research study, you need to understand who it’s going to and how they best receive this type of content. Posting it out when none of your followers are in your user group may not be the best approach. Do a quick brainstorm about the best way to reach them. For example if your users are internal staff, there might be an internal communications channel such as an all-staff newsletter, intranet or social media site that you can share the link and approach content to.
And by that I’m talking about both the engagement mechanism and the study itself. I learned this one the hard way. Time is everything and no matter your intentions, no one wants to spend more time than they have to. Even more so in situations where you’re unable to provide incentives (yep, I’ve been there). As a rule, I always stick to no more than 10 questions in a remote research study and for card sorts, I’ll never include more than 60 cards. Anything more than that will see a spike in abandonment rates and of course only serve to annoy and frustrate your participants. You need to ensure that you’re balancing your need to gain insights with their time constraints.
As for the accompanying approach content, short and snappy equals happy! In the case of an email, website, other social media post, newsletter, carrier pigeon etc, keep your approach spiel to no more than a paragraph. Use an audience appropriate tone and stick to the basics such as: a high level sentence on what you’re doing, roughly how long the study will take participants to complete, details of any incentives on offer and of course don’t forget to thank them.
The default instructions in Optimal Workshop’s suite of tools are really well designed and I’ve learned to borrow from them for my approach content when sending the link out. There’s no need for wheel reinvention and it usually just needs a slight tweak to suit the specific study. This also helps provide participants with a consistent experience and minimizes confusion allowing them to focus on sharing those valuable insights!
When you’re on to something that works — turn it into a template! Every time I create a study or send one out, I save it for future use. It still needs minor tweaks each time, but I use them to iterate my template.What are your top tips for creating and sending out remote user research studies? Comment below!

