August 15, 2022
2 min

Card Sorting vs Tree Testing: what's the best?

A great information architecture (IA) is essential for a great user experience (UX). And testing your website or app’s information architecture is necessary to get it right.

Card sorting and tree testing are the very best UX research methods for exactly this. But the big question is always: which one should you use, and when? Very possibly you need both. Let’s find out with this quick summary.

What is card sorting and tree testing? 🧐

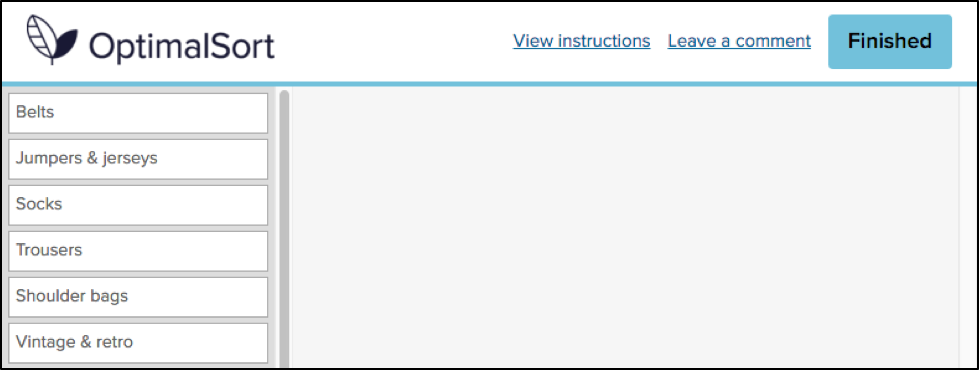
Card sorting is used to test the information architecture of a website or app. Participants group individual labels (cards) into different categories according to  criteria that makes best sense to them. Each label represents an item that needs to be categorized. The results provide deep insights to guide decisions needed to create an intuitive navigation, comprehensive labeling and content that is organized in a user-friendly way.

Tree testing is also used to test the information architecture of a website or app. When using tree testing participants are presented with a site structure and a set of tasks they need to complete. The goal for participants is to find their way through the site and complete their task. The test shows whether the structure of your website corresponds to what users expect and how easily (or not) they can navigate and complete their tasks.

What are the differences? 🂱 👉🌴

Card sorting is a UX research method which helps to gather insights about your content categorization. It focuses on creating an information architecture that responds intuitively to the users’ expectations. Things like which items go best together, the best options for labeling, what categories users expect to find on each menu.

Doing a simple card sort can give you all those pieces of information and so much more. You start understanding your user’s thoughts and expectations. Gathering enough insights and information to enable you to develop several information architecture options.

Tree testing is a UX research method that is almost a card sort in reverse. Tree testing is used to evaluate an information architecture structure and simply allows you to see what works and what doesn’t. 

Using tree testing will provide insights around whether your information architecture is intuitive to navigate, the labels easy to follow and ultimately if your items are categorized in a place that makes sense. Conversely it will also show where your users get lost and how.

What method should you use? 🤷

You’ve got this far and fine-tuning your information architecture should be a priority. An intuitive IA is an integral component of a user-friendly product. Creating a product that is usable and an experience users will come back for.

If you are still wondering which method you should use - tree testing or card sorting. The answer is pretty simple - use both.

Just like many great things, these methods work best together. They complement each other, allowing you to get much deeper insights and a rounded view of how your IA performs and where to make improvements than when used separately. We cover more reasons why card sorting loves tree testing in our article which dives deeper into why to use both.

Ok, I'm using both, but which comes first? 🐓🥚

Wanting full, rounded insights into your information architecture is great. And we know that tree testing and card sorting work well together. But is there an order you should do the testing in? It really depends on the particular context of your research - what you’re trying to achieve and your situation. 

Tree testing is a great tool to use when you have a product that is already up and running. By running a tree test first you can quickly establish where there may be issues, or snags. Places where users get caught and need help. From there you can try and solve potential issues by moving on to a card sort. 

Card sorting is a super useful method that can be instigated at any stage of the design process, from planning to development and beyond.  As long as there is an IA structure that can be tested again. Testing against an already existing website navigation can be informative. Or testing a reorganization of items (new or existing) can ensure the organization can align with what users expect.

However, when you decide to implement both of the methods in your research, where possible, tree testing should come before card sorting. If you want a little more on the issue have a read of our article here.

Check out our OptimalSort and Treejack tools - we can help you with your research and the best way forward. Wherever you might be in the process.

Share this article
Author
Optimal
Workshop

Related articles

View all blog articles
Learn more
1 min read

Ready for take-off: Best practices for creating and launching remote user research studies

"Hi Optimal Work,I was wondering if there are some best practices you stick to when creating or sending out different UX research studies (i.e. Card sorts, Prototyye Test studies, etc)? Thank you! Mary"

Indeed I do! Over the years I’ve learned a lot about creating remote research studies and engaging participants. That experience has taught me a lot about what works, what doesn’t and what leaves me refreshing my results screen eagerly anticipating participant responses and getting absolute zip. Here are my top tips for remote research study creation and launch success!

Creating remote research studies

Use screener questions and post-study questions wisely

Screener questions are really useful for eliminating participants who may not fit the criteria you’re looking for but you can’t exactly stop them from being less than truthful in their responses. Now, I’m not saying all participants lie on the screener so they can get to the activity (and potentially claim an incentive) but I am saying it’s something you can’t control. To help manage this, I like to use the post-study questions to provide additional context and structure to the research.

Depending on the study, I might ask questions to which the answers might confirm or exclude specific participants from a specific group. For example, if I’m doing research on people who live in a specific town or area, I’ll include a location based question after the study. Any participant who says they live somewhere else is getting excluded via that handy toggle option in the results section. Post-study questions are also great for capturing additional ideas and feedback after participants complete the activity as remote research limits your capacity to get those — you’re not there with them so you can’t just ask. Post-study questions can really help bridge this gap. Use no more than five post-study questions at a time and consider not making them compulsory.

Do a practice run

No matter how careful I am, I always miss something! A typo, a card with a label in the wrong case, forgetting to update a new version of an information architecture after a change was made — stupid mistakes that we all make. By launching a practice version of your study and sharing it with your team or client, you can stop those errors dead in their tracks. It’s also a great way to get feedback from the team on your work before the real deal goes live. If you find an error, all you have to do is duplicate the study, fix the error and then launch. Just keep an eye on the naming conventions used for your studies to prevent the practice version and the final version from getting mixed up!

Sending out remote research studies

Manage expectations about how long the study will be open for

Something that has come back to bite me more than once is failing to clearly explain when the study will close. Understandably, participants can be left feeling pretty annoyed when they mentally commit to complete a study only to find it’s no longer available. There does come a point when you need to shut the study down to accurately report on quantitative data and you’re not going to be able to prevent every instance of this, but providing that information upfront will go a long way.

Provide contact details and be open to questions

You may think you’re setting yourself up to be bombarded with emails, but I’ve found that isn’t necessarily the case. I’ve noticed I get around 1-3 participants contacting me per study. Sometimes they just want to tell me they completed it and potentially provide additional information and sometimes they have a question about the project itself. I’ve also found that sometimes they have something even more interesting to share such as the contact details of someone I may benefit from connecting with — or something else entirely! You never know what surprises they have up their sleeves and it’s important to be open to it. Providing an email address or social media contact details could open up a world of possibilities.

Don’t forget to include the link!

It might seem really obvious, but I can’t tell you how many emails I received (and have been guilty of sending out) that are missing the damn link to the study. It happens! You’re so focused on getting that delivery right and it becomes really easy to miss that final yet crucial piece of information.

To avoid this irritating mishap, I always complete a checklist before hitting send:

  • Have I checked my spelling and grammar?
  • Have I replaced all the template placeholder content with the correct information?
  • Have I mentioned when the study will close?
  • Have I included contact details?
  • Have I launched my study and received confirmation that it is live?
  • Have I included the link to the study in my communications to participants?
  • Does the link work? (yep, I’ve broken it before)

General tips for both creating and sending out remote research studies

Know your audience

First and foremost, before you create or disseminate a remote research study, you need to understand who it’s going to and how they best receive this type of content. Posting it out when none of your followers are in your user group may not be the best approach. Do a quick brainstorm about the best way to reach them. For example if your users are internal staff, there might be an internal communications channel such as an all-staff newsletter, intranet or social media site that you can share the link and approach content to.

Keep it brief

And by that I’m talking about both the engagement mechanism and the study itself. I learned this one the hard way. Time is everything and no matter your intentions, no one wants to spend more time than they have to. Even more so in situations where you’re unable to provide incentives (yep, I’ve been there). As a rule, I always stick to no more than 10 questions in a remote research study and for card sorts, I’ll never include more than 60 cards. Anything more than that will see a spike in abandonment rates and of course only serve to annoy and frustrate your participants. You need to ensure that you’re balancing your need to gain insights with their time constraints.

As for the accompanying approach content, short and snappy equals happy! In the case of an email, website, other social media post, newsletter, carrier pigeon etc, keep your approach spiel to no more than a paragraph. Use an audience appropriate tone and stick to the basics such as: a high level sentence on what you’re doing, roughly how long the study will take participants to complete, details of any incentives on offer and of course don’t forget to thank them.

Set clear instructions

The default instructions in Optimal Workshop’s suite of tools are really well designed and I’ve learned to borrow from them for my approach content when sending the link out. There’s no need for wheel reinvention and it usually just needs a slight tweak to suit the specific study. This also helps provide participants with a consistent experience and minimizes confusion allowing them to focus on sharing those valuable insights!

Create a template

When you’re on to something that works — turn it into a template! Every time I create a study or send one out, I save it for future use. It still needs minor tweaks each time, but I use them to iterate my template.What are your top tips for creating and sending out remote user research studies? Comment below!

Learn more
1 min read

Live training: How to benchmark an existing site structure using Treejack

If you missed our live training, don’t worry, we’ve got you covered! In this session, our product experts Katie and Aidan discuss why, how and when to benchmark an existing structure using Treejack.

They also talk through some benchmarking use cases, demo how to compare tasks between different studies, and which results are most helpful.

Learn more
1 min read

How to Spot and Destroy Evil Attractors in Your Tree (Part 1)

Usability guru Jared Spool has written extensively about the 'scent of information'. This term describes how users are always 'on the hunt' through a site, click by click, to find the content they’re looking for. Tree testing helps you deliver a strong scent by improving organisation (how you group your headings and subheadings) and labelling (what you call each of them).

Anyone who’s seen a spy film knows there are always false scents and red herrings to lead the hero astray. And anyone who’s run a few tree tests has probably seen the same thing — headings and labels that lure participants to the wrong answer. We call these 'evil attractors'.In Part 1 of this article, we’ll look at what evil attractors are, how to spot them at the answer end of your tree, and how to fix them. In Part 2, we’ll look at how to spot them in the higher levels of your tree.

The false scent — what it looks like in practice

One of my favourite examples of an evil attractor comes from a tree test we ran for consumer.org.nz, a New Zealand consumer-review website (similar to Consumer Reports in the USA). Their site listed a wide range of consumer products in a tree several levels deep, and they wanted to try out a few ideas to make things easier to find as the site grew bigger.We ran the tests and got some useful answers, but we also noticed there was one particular subheading (Home > Appliances > Personal) that got clicks from participants looking for very different things — mobile phones, vacuum cleaners, home-theatre systems, and so on:

pic1

The website intended the Personal appliance category to be for products like electric shavers and curling irons. But apparently, Personal meant many things to our participants: they also went there for 'personal' items like mobile phones and cordless drills that actually lived somewhere else.This is the false scent — the heading that attracts clicks when it shouldn’t, leading participants astray. Hence this definition: an evil attractor is a heading that draws unwanted traffic across several unrelated tasks.

Evil attractors lead your users astray

Attracting clicks isn’t a bad thing in itself. After all, that’s what a good heading does — it attracts clicks for the content it contains (and discourages clicks for everything else). Evil attractors, on the other hand, attract clicks for things they shouldn’t. These attractors lure users down the wrong path, and when users find themselves in the wrong place they'll either back up and try elsewhere (if they’re patient) or give up (if they’re not). Because these attractor topics are magnets for the user’s attention, they make it less likely that your user will get to the place you intended. The other evil part of these attractors is the way they hide in the shadows. Most of the time, they don’t get the lion’s share of traffic for a given task. Instead, they’ll poach 5–10% of the responses, luring away a fraction of users who might otherwise have found the right answer.

Find evil attractors easily in your data

The easiest attractors to spot are those at the answer end of your tree (where participants ended up for each task). If we can look across tasks for similar wrong answers, then we can see which of these might be evil attractors.In your Treejack results, the Destinations tab lets you do just that. Here’s more of the consumer.org.nz example:

Pic2

Normally, when you look at this view, you’re looking down a column for big hits and misses for a specific task. To look for evil attractors, however, you’re looking for patterns across rows. In other words, you’re looking horizontally, not vertically. If we do that here, we immediately notice the row for Personal (highlighted yellow). See all those hits along the row? Those hits indicate an attractor — steady traffic across many tasks that seem to have little in common. But remember, traffic alone is not enough. We’re looking for unwanted traffic across unrelated tasks. Do we see that here? Well, it looks like the tasks (about cameras, drills, laptops, vacuums, and so on) are not that closely related. We wouldn’t expect users to go to the same topic for each of these. And the answer they chose, Personal, certainly doesn’t seem to be the destination we intended. While we could rationalise why they chose this answer, it is definitely unwanted from an IA perspective. So yes, in this case, we seem to have caught an evil attractor red-handed. Here’s a heading that’s getting steady traffic where it shouldn’t.

Evil attractors are usually the result of ambiguity

It’s usually quite simple to figure out why an item in your tree is an evil attractor. In almost all cases, it’s because the item is vague or ambiguous — a word or phrase that could mean different things to different people. Look at our example above. In the context of a consumer-review site, Personal is too general to be a good heading. It could mean products you wear, or carry, or use in the bathroom, or a number of things. So, when those participants come along clutching a task, and they see Personal, a few of them think 'That looks like it might be what I’m looking for', and they go that way.Individually, those choices may be defensible, but as an information architect, are you really going to group mobile phones with vacuum cleaners? The 'personal' link between them is tenuous at best.

Destroy evil attractors by being specific

Just as it’s easy to see why most attractors attract, it’s usually easy to fix them. Evil attractors trade in vagueness and ambiguity, so the obvious remedy is to make those headings more concrete and specific. In the consumer-site example, we looked at the actual content under the Personal heading. It turned out to be items like shavers, curling irons, and hair dryers. A quick discussion yielded Personal care as a promising replacement — one that should deter people looking for mobile phones and jewellery and the like.In the second round of tree testing, among the other changes we made to the tree, we replaced Personal with Personal Care. A few days later, the results confirmed our thinking. Our former evil attractor was no longer luring participants away from the correct answers:

Pic3

Testing once is good, testing twice is magic

This brings up a final point about tree testing (and about any kind of user testing, really): you need to iterate your testing —  once is not enough.The first round of testing shows you where your tree is doing well (yay!) and where it needs more work so you can make some thoughtful revisions. Be careful though. Even if the problems you found seem to have obvious solutions, you still need to make sure your revisions actually work for users, and don’t cause further problems. The good news is, it’s dead easy to run a second test, because it’s just a small revision of the first. You already have the tasks and all the other bits worked out, so it’s just a matter of making a copy in Treejack, pasting in your revised tree, and hooking up the correct answers. In an hour or two, you’re ready to pilot it again (to err is human, remember) and send it off to a fresh batch of participants.

Two possible outcomes await.

  • Your fixes are spot-on, the participants find the correct answers more frequently and easily, and your overall score climbs. You could have skipped this second test, but confirming that your changes worked is both good practice and a good feeling. It’s also something concrete to show your boss.
  • Some of your fixes didn’t work, or (given the tangled nature of IA work) they worked for the problems you saw in Round 1, but now they’ve caused more problems of their own. Bad news, for sure. But better that you uncover them now in the design phase (when it takes a few days to revise and re-test) instead of further down the track when the IA has been signed off and changes become painful.

Stay tuned for more on evil attractors

In Part 1, we’ve covered what evil attractors are and how to spot them at the answer end of your tree: that is, evil attractors that participants chose as their destination when performing tasks. Hopefully, a future version of Treejack will be able to highlight these attractors to make your analysis that much easier.

In Part 2, we’ll look at how to spot evil attractors in the intermediate levels of your tree, where they lure participants into a section of the site that you didn’t intend. These are harder to spot, but we’ll see if we can ferret them out.Let us know if you've caught any evil attractors red-handed in your projects.

Seeing is believing

Explore our tools and see how Optimal makes gathering insights simple, powerful, and impactful.